In Google Search Console (GSC), “Excluded by noindex tag” is a status that indicates Google found a noindex tag on a particular webpage. This tag instructs search engines like Google to not include that page in their search results. This tag can be added intentionally to prevent a page from being indexed, such as a login page or staging site, or it can be added accidentally, or by a plugin or theme.
Website owners use noindex tags for various reasons, such as:
- Hiding pages not intended for public search, like login portals or admin dashboards.
- Preventing duplicate content from appearing in search results.
- Excluding low-quality or thin content that might harm SEO.
<meta name=”robots” content=”index, follow”>

What Does “Excluded by NoIndex Tag” Status Mean?
Imagine your webpage wearing an invisible cloak that keeps it hidden from search engines. That’s what a noindex tag does, it tells search engines like Google to skip over your page when they’re indexing the web. There are a few reasons why this might happen:
- Accidental Noindexing: You might have mistakenly added a noindex tag to your page while editing its code.
- WordPress Settings: In WordPress, there’s an option that can accidentally tell search engines to stay away from your site.
- Plugins or Scripts: Sometimes, plugins or scripts on your site can sneakily add a noindex tag without you realizing it.
- Hacking: In a worst-case scenario, hackers could have breached your site and planted a noindex tag to keep your pages out of search results.
If you want your page to show up in search results, you’ll need to find and remove the noindex tag.
How to Fix “Excluded By Noindex Tag” Error?
Identify Affected Pages:
In Google Search Console, go to the “Indexing” report. Here, you can see a list of URLs that are excluded due to the noindex tag. Review these URLs to understand which pages are affected.
Remove or Update noindex Tags:
- If the noindex tag is used intentionally on certain pages that you don’t want to be indexed, and you have a valid reason for it, then leave it as is.
- If the noindex tag was added accidentally, you can remove it from the HTML source code of the affected pages or change from the SEO plugin in which advance setting.
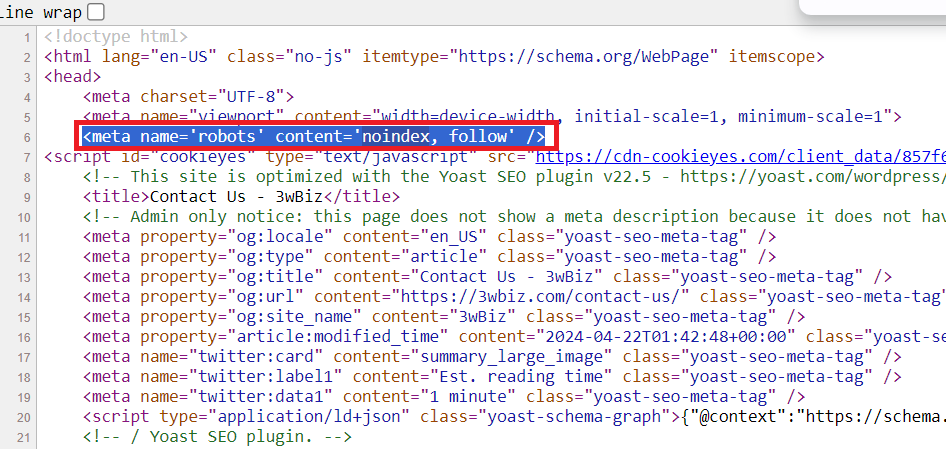
Check Meta Robots Tag:
Ensure that your pages have the correct meta robots tag in the HTML head section. To allow indexing, the tag should be set to “index, follow.” If it’s set to “noindex, nofollow,” change it accordingly.

<meta name=”robots” content=”index, follow”>
Review CMS or SEO Plugin Settings:
If you’re using a Content Management System (CMS) or an SEO plugin (e.g., Yoast SEO for WordPress), check their settings. Sometimes, these tools can automatically add noindex tags, and you may need to adjust their configuration.
In SEO Plugin like Rank Math or Yoast SEO in which you need to check the Advance setting.
Click on the Advance setting.
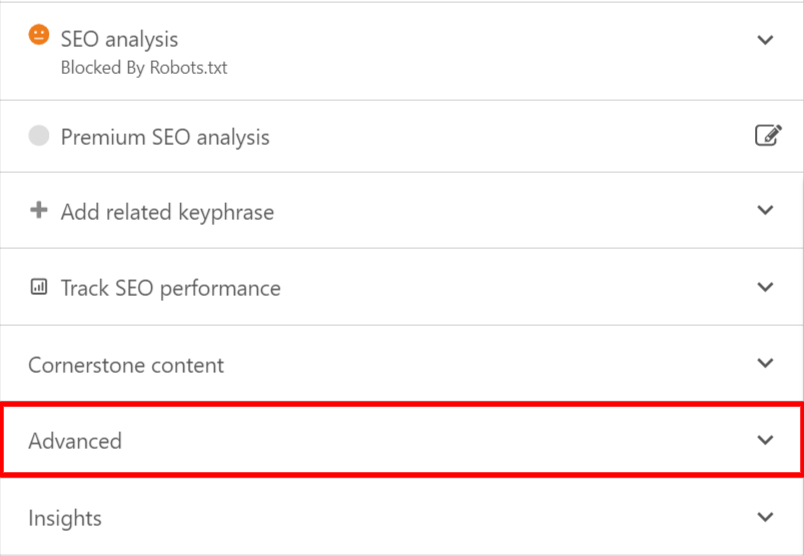
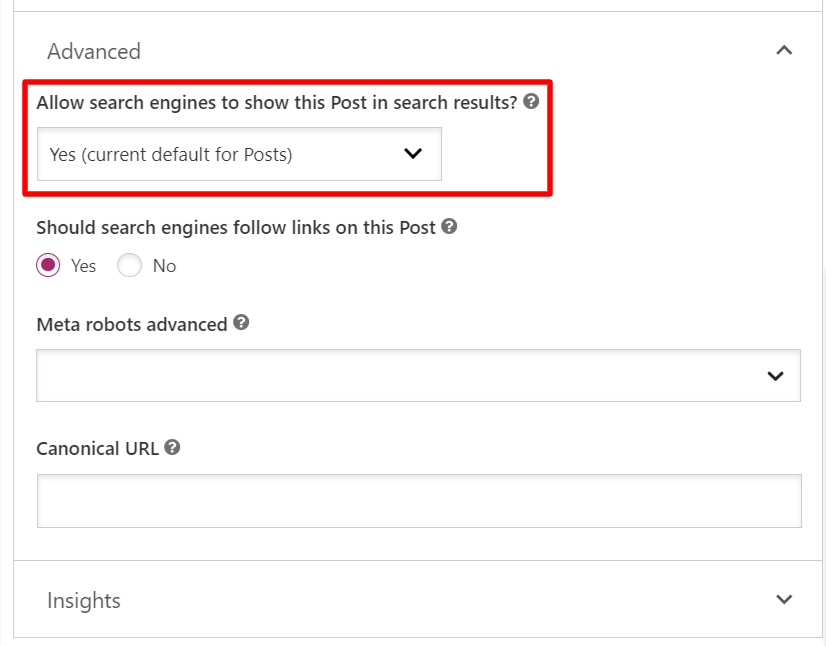
Check you Search Engine to show this post in search result. If this is “No” then change with default “Yes” setting.
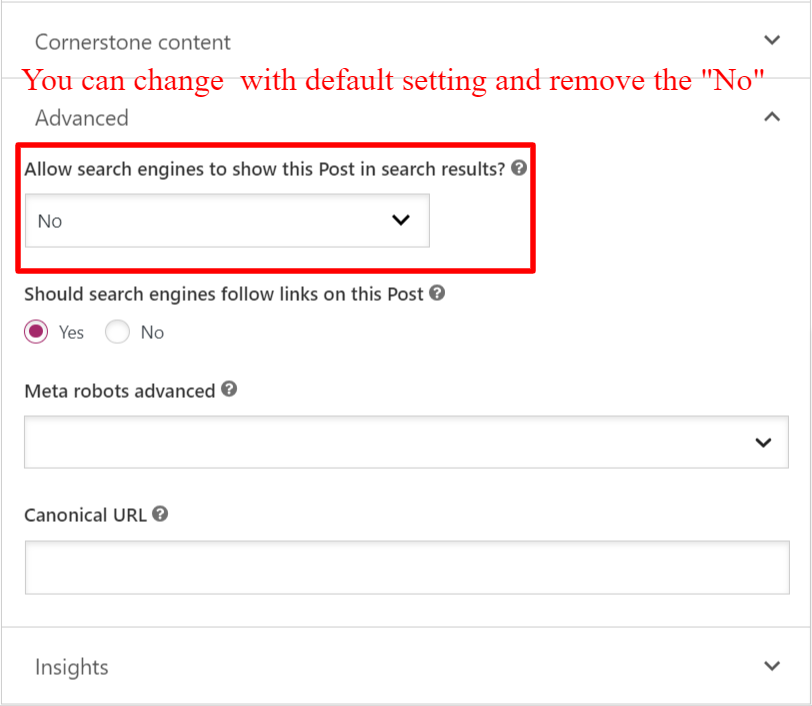
After change your setting then save.
Submit Updated Sitemap:
After making changes to the affected pages, update your XML sitemap and submit it to Google Search Console. This can help Google re-crawl and re-index the pages.
Fetch and Render:
In Google Search Console, use the “Fetch as Google” or “URL Inspection” tool to request indexing for the pages you’ve updated. This can expedite the re-indexing process.
Monitor Progress:
Keep an eye on Google Search Console’s Indexing report to see if the error persists. It may take some time for Google to re-crawl and index the corrected pages.
Remember that Googlebot may not immediately re-crawl and index your pages, so be patient and monitor the situation in Google Search Console over time.
So, I recommend checking the official Google Search Console Help Center or Google’s official webmaster guidelines for the most up-to-date information and resources:
Conclusion
Fixing the “excluded by noindex tag error” in Google Search Console is crucial for improving your website’s search visibility and organic traffic. By following the steps outlined in this guide and understanding the common causes, you can effectively resolve this issue and ensure that your web pages are indexed properly. Don’t let indexing errors hinder your website’s potential; take action today!
FAQs
Q: What causes the “Excluded by Noindex Tag Error” in the first place?
A: The error can occur due to misconfigured meta tags, CMS settings, or SEO plugins that accidentally apply noindex directives to your web pages.
Q: How can I prevent this error from happening in the future?
A: Regularly audit your website’s meta tags, CMS settings, and SEO plugins to ensure they’re correctly configured. This will help prevent the error from reoccurring.
Q: Are there any tools that can help identify the “Excluded by Noindex Tag Error” automatically?
A: Yes, tools like Google Search Console and SEO plugins can help you identify pages affected by this error.
Q: Is it possible to recover lost search engine ranking after fixing this error?
A: While it may take some time, fixing the error can lead to a gradual recovery of your search engine ranking as your pages are reindexed.
Q: Can I fix the “Excluded by Noindex Tag Error” for my entire website at once?
A: If the error is site-wide, you may need to address it on a page-by-page basis. However, with a CMS, you can often make bulk changes to meta tags.
Q: How can I check if my changes have resolved the issue?
A: Use Google Search Console and regularly monitor the indexing status of your affected pages. This will help you confirm that the error has been resolved.